
Part 2 - Pre-build preparations
Before assembling the board, there are a few things to check.
- Check for any major external flaws that would disqualify the board as an A-stock unit (if you have purchased a regular unit rather than B-stock).
If you have any major flaws on the case that require a replacement, do not continue further and contact the vendor you purchased from immediately. We can't handle RMA units if the board has been built, so keep everything unused. - If not already done, double-check that all the contents of the package listed in part 1 are actually included in the box. It's a nightmare if you get partway through the build and realize a part is missing.
- Verify that the PCB functions.
- First, unbox the PCB, USB daugherboard, and connection cable.
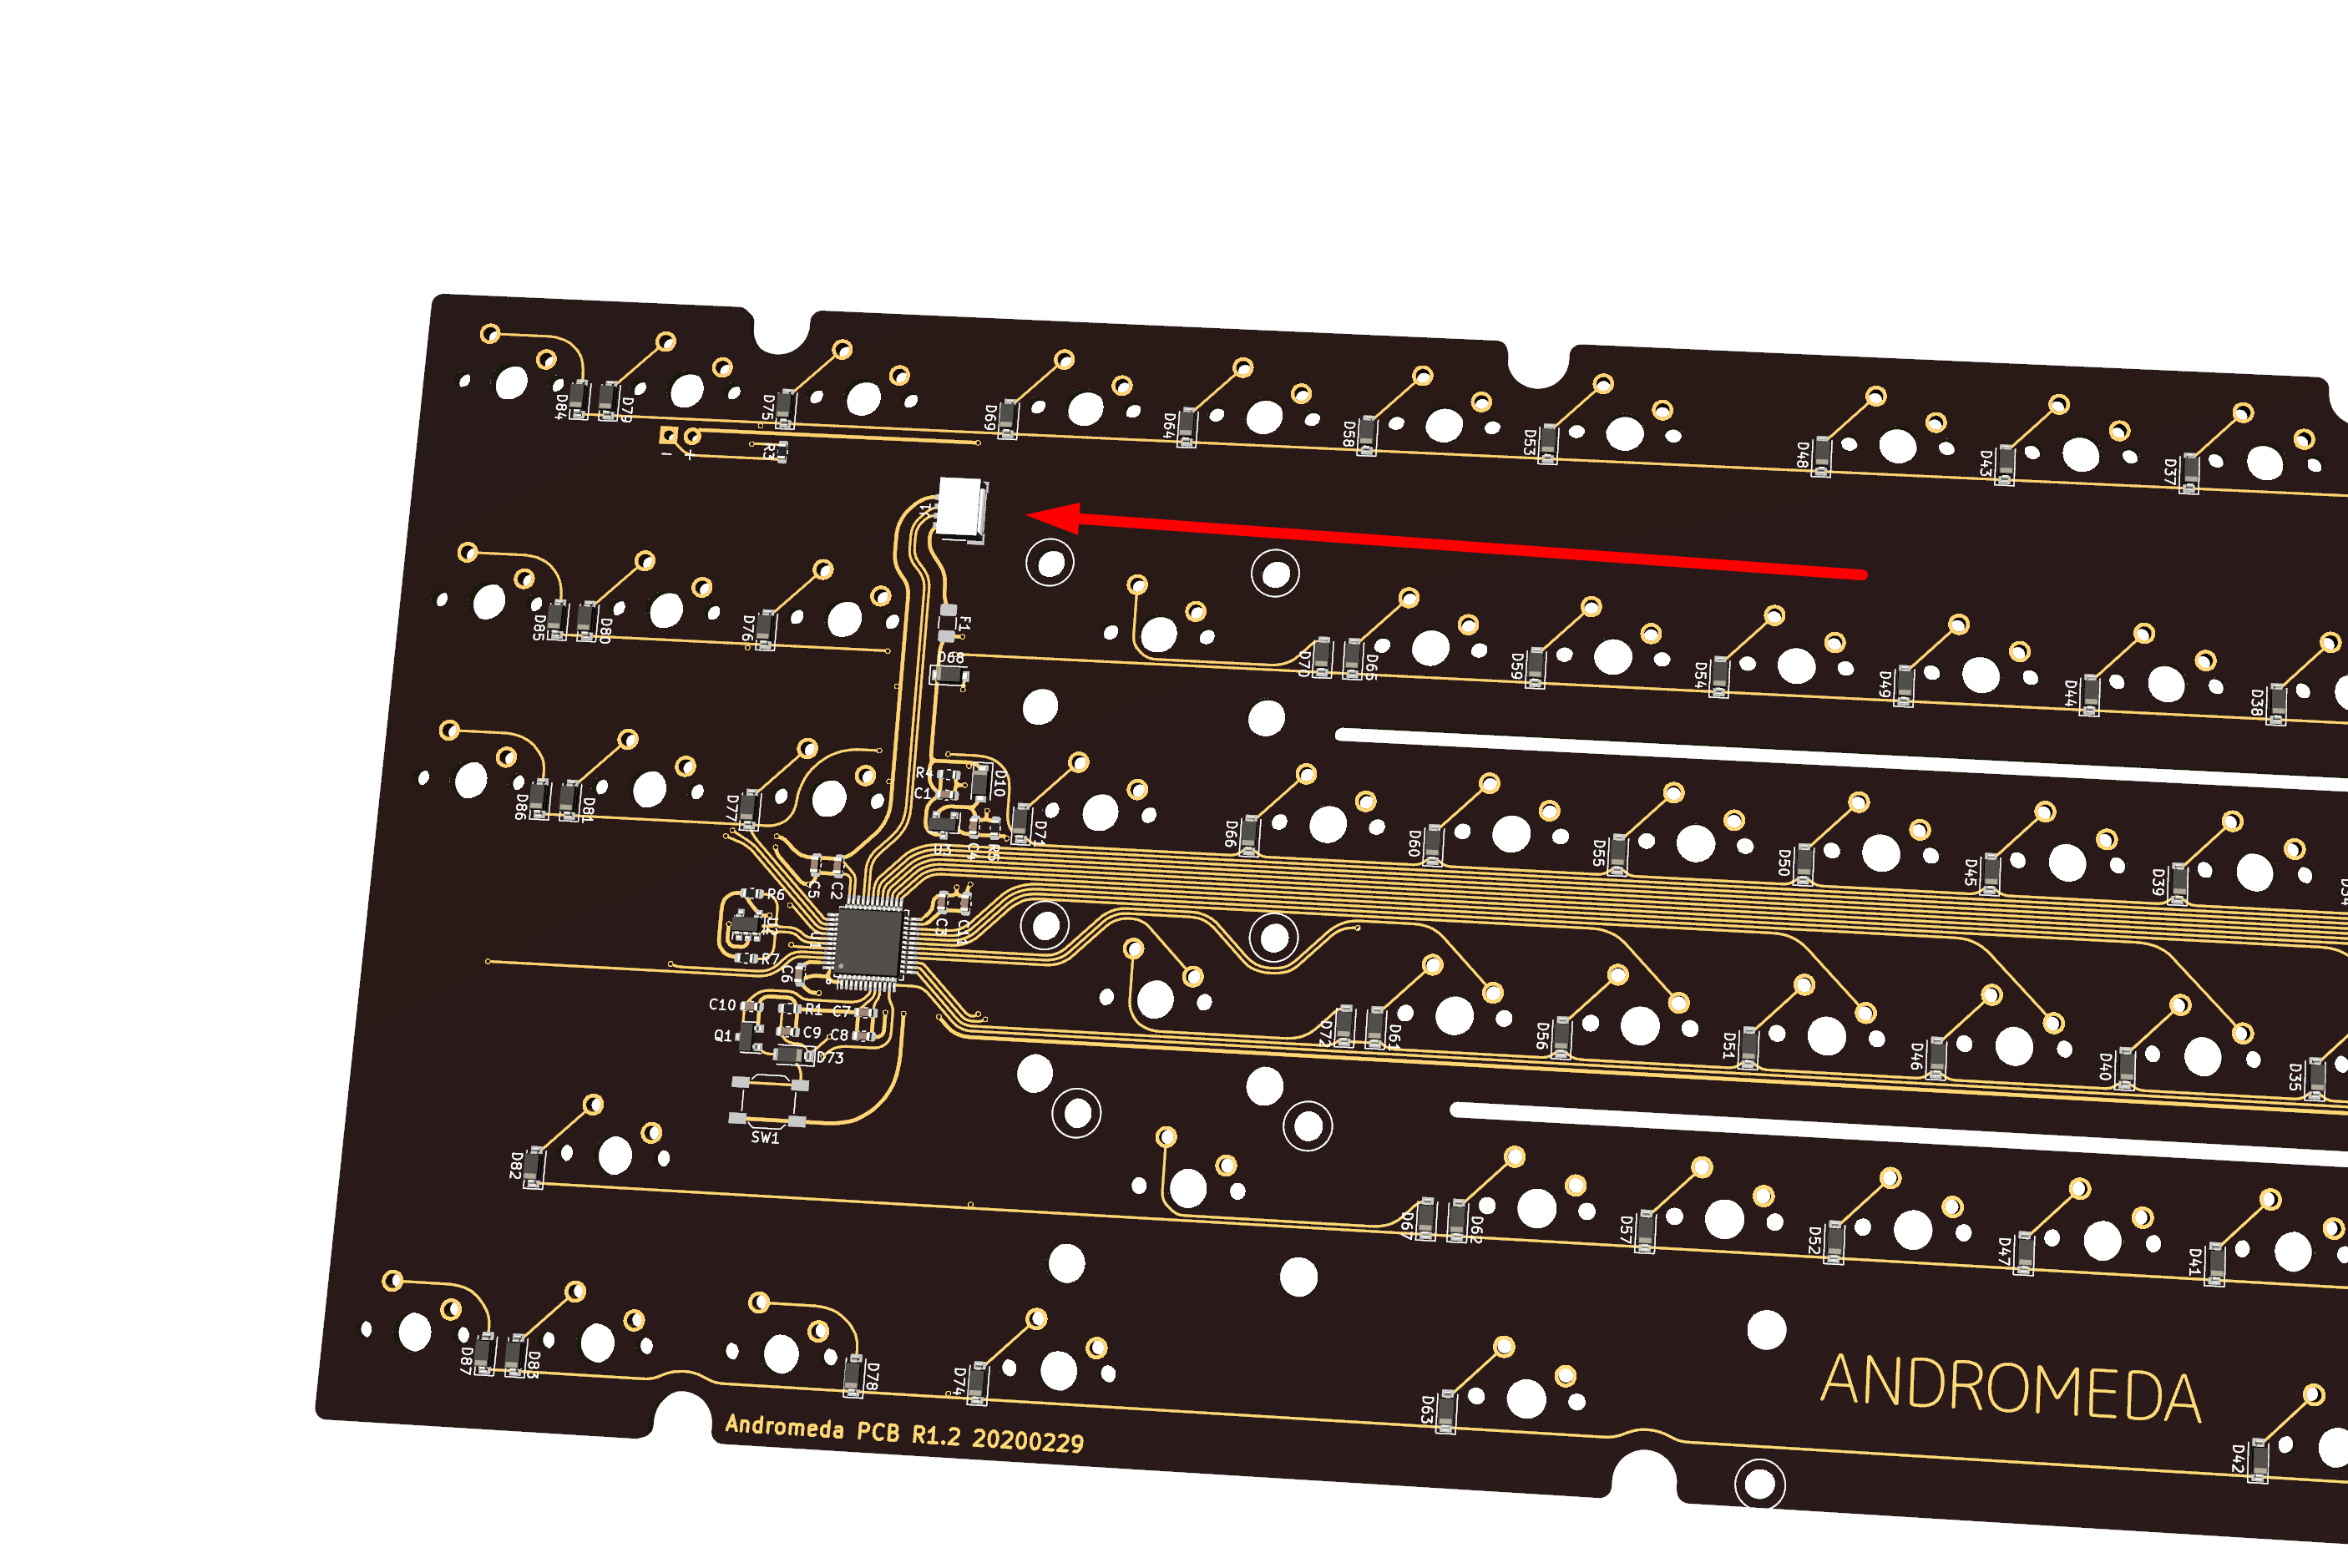
- Gently connect the cable into the main PCB (connector is at the "crossroads" between the function keys, alphanumerics, and TKL clusters.)
To avoid destroying the connector, verify the orientation of the connector on the PCB and cable, align them together, and gently latch them together while holding the connector on the PCB side. Forcefully shoving the cable in risks shearing the connector off the main PCB.
- Connect the other end of the cable into the connector on the USB daughterboard, again verifying orientation and taking care not to damage the parts.
- Plug in a USB cable into the USB daughterboard, and connect it to a computer. The PCB should appear in device manager or similar.
These steps are important because replacements for the parts or board are difficult after the board has exited unbuilt condition; if you spot any issues, please contact us for a replacement before building the board.